How to Disable Read-Only Attribute from Folders?
- The best solution to restore mistakenly deleted read-only files/folders
- Folders lost due to accidental format, system upgrade, and corruptions can be retrieved
- All file formats of text and media are supported
After upgrading the system to Windows 10, if you face an annoying problem wherein certain folders cannot be accessed since they open as read-only. In fact, after a little probing here and there, you find that most document folders are set to read-only. Sounds quite an irritating situation to face, right?
The read-only is a file attribute which means a file can only be opened or read. Deleting or renaming the file cannot be done. The immediate thing any user would do is right-click on the folder to bring up Properties dialog, and in the General tab, the Attributes Read-only box is unchecked. However, when the dialog box is brought up again, the read-only attribute is still set. So what else can be done to stop folders from being set to read-only?
If you are looking for any fixes for this issue, then here you go. Some most suitable methods to disable folders from being in read-only mode are discussed down here-
Method 1: Using CMD
In this method, you try to force Windows to remove the read-only attribute from the folder.
- Go to Start menu, and type cmd in the search bar
- In Command Prompt window, type the following command –
attrib -r +s C:\Users\YourUserName\Foldername
Method 2: Get Full Control
If using the Command Prompt to disable read-only attribute doesn’t work out, then here is another method you can try out. If you are the only user on your computer, then follow the steps mentioned here –
- Right-click on ‘C’ drive, and select Properties
- Go to Security tab --> Advanced --> Change Permissions
- Select the appropriate user, and click Edit
- Next, select This folder, subfolders, and files under Applies to tab
- Under Basic Permissions, select Full Control, and click Ok
If other users are present, then go through this –
- In ‘C’ drive, right-click on your username in Users folder, then select Properties
- In the Security tab, go to Advanced, and hit on Continue
- Now click on Enable Inheritance
This should fix the read-only issue on your folder. Well, you might have experienced the read-only issue with folders after Windows upgrade. However, many users also face other issues after a Windows upgrade. Your documents could get deleted or go missing after upgrade operation. But irrespective of the reasons behind the data, the loss Folder Recovery utility can recover folders and files on Windows.
Folder Recovery tool even restores lost/deleted folders from various external drives. The software supports folder recovery on Windows 7, Windows 8, Windows 10, Windows XP, Vista, Windows Server 2003, Windows Server 2008, and other editions. It scans the complete Windows storage drive thoroughly and fetches all the folders which are missing or erased.
How to restore read-only folders that are lost/deleted?
Step 1: Download and run the Folder Recovery on your computer. Select Recover Files option on the main screen.
Step 2: Select the drive from where the folders got deleted or lost. Hit on the Scan button.
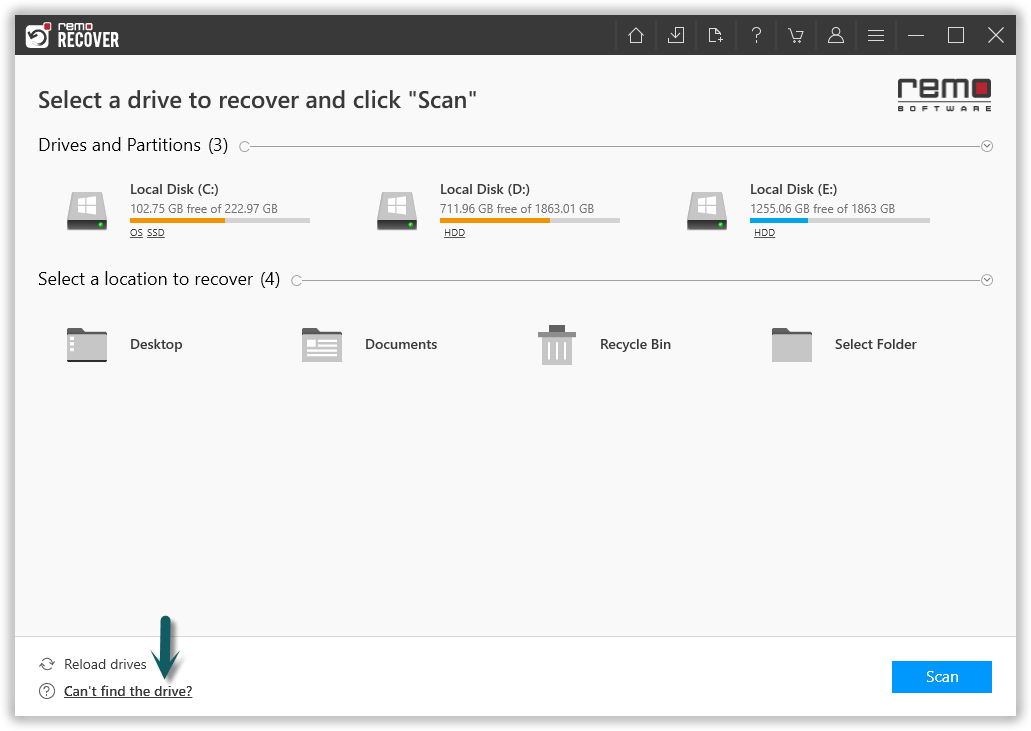
Figure 1: Recover Partitions/Drives
Step 3: The deleted/lost files are extracted during the scanning process.
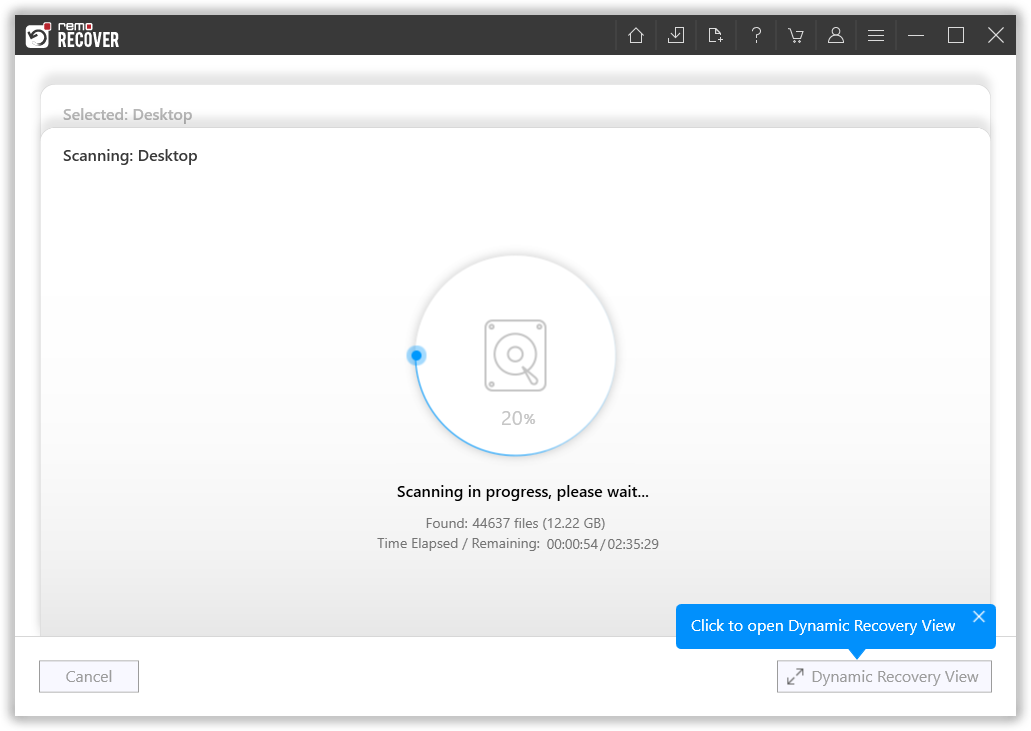
Figure 2: Scanning for Folders
Step 4: The set of recovered files appear in File Type View and Data View files.
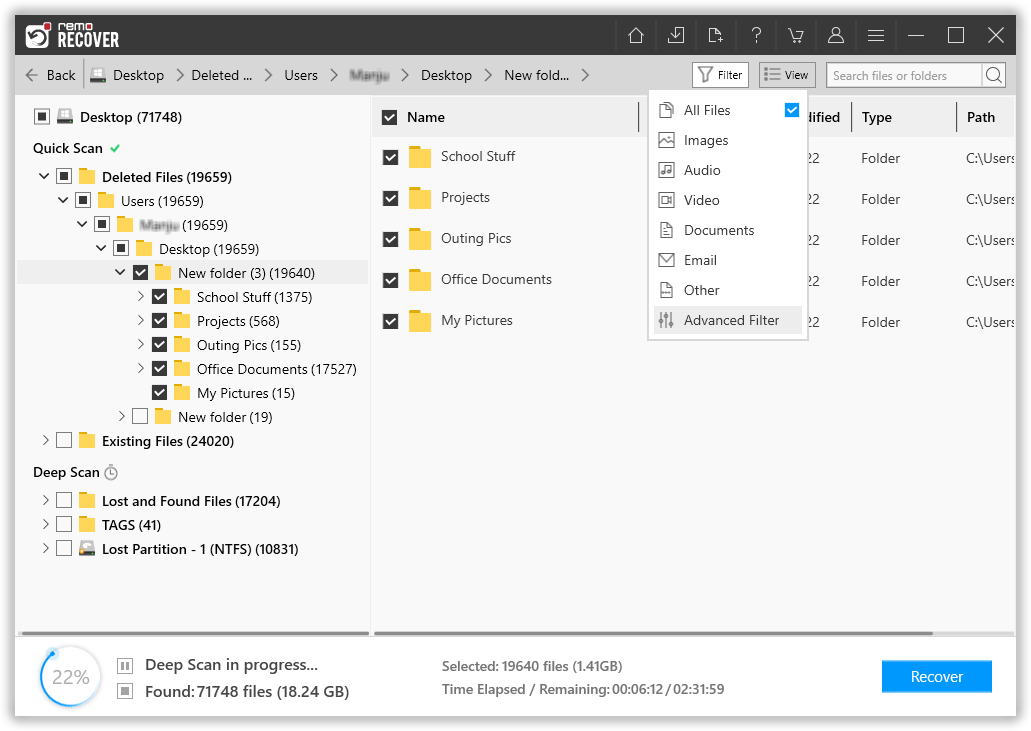
Figure 3: Recovered Folders
Step 4: Mark the files and folders that wish to save.
Step 5: Specify the target drive location to save the restored file items. Hit on the Save button.

Figure 4: Save Recovered Folders